


I’ll never forget the first time I smelled a warm shampoo blend fresh out of the mixer, it was richer than anything from a bottle.
That moment made me want to learn how every step turned raw ingredients into finished products.
So, I visited plants, watched batches get tested, and stood by operators adjusting temps and speeds to keep things right.
I’ve supported many brand owners through these same tours and planning sessions, so I know what to look for and what can trip you up.
In this guide, you’ll see each stage, shaped by my hours spent alongside mixers, QC teams, and crews prepping bulk tanks for your products.
If you’re serious about scaling your brand, you’ll want to read this closely.
So let’s start!
Quick Summary Chart
Here’s a quick look at the entire process laid out step by step. It’ll give you a snapshot before we explore each part in more depth later.
| Step | What To Do |
| 1. Formulation Development | Define your shampoo’s main purpose, feel, key ingredients, and target customer. |
| 2. Raw Material Inspection | Check specs, test for contamination, inspect by sight, and keep clear records. |
| 3. Pre-Weighing & Staging | Weigh, label, and line up all ingredients in order by the mixer. |
| 4. Blending & Mixing | Load ingredients in sequence, mix at proper speed, and watch viscosity and temps. |
| 5. Heating & Homogenization | Heat steadily, run the homogenizer if needed, and document your process. |
| 6. Cooling & pH Adjustment | Cool down slowly, stir, adjust pH in small steps, and record changes. |
| 7. Quality Control Testing | Check pH, viscosity, microbes, quick stability, and write everything down. |
| 8. Filling & Packaging | Sanitize lines, fill evenly, adjust for thickness, and pack with care. |
| 9. Final Inspection | Check packaging, labels, seals, sign off reports, and store samples. |
That gives you the big picture. Next, we’ll break down every stage in detail.
Step#1 Formulation Development
So you want to develop your own shampoo. But do you really know what you’re making and who it’s for?
That’s what this step locks in: taking your broad idea and turning it into a formula you can actually produce:
Think Of Your Goals
- Get Clear On The Main Job: Is it daily cleansing, scalp soothing, color safe? I always tell brand owners, pick one main promise.
- Know Your Customer: Are you making this for salons that demand thick lathers, or budget chains that want something light and easy to rinse? That choice shapes everything.
- Decide On Feel And Foam: Should it be creamy or clear? Big suds or gentle bubbles? I’ve stood at production lines tweaking batches just to hit the right foam.
- Pick Key Ingredients Early: Maybe argan oil, tea tree, or a silicone alternative. Limit yourself to a few stars. Too many activities can bust your costs or break stability.
- Write Down Your Core Pitch: Mine was once, “Mild, daily shampoo for color-treated hair.” It helped keep us on track when new ideas popped up.
Plan With Climate
- Hot Climates Need Different Builds: Lighter shampoos do better in humid places where heavy feels greasy.
- Think Packaging Early: Pumps work well for bulk salon jugs. Flip-tops or tubes might suit travel sizes.
- Consider How Hair Needs Change: Dry winters might favor a richer formula. Sweaty summers lean toward lighter cleansers.

Step#2 Raw Material Inspection
Now that your formula is set, you need to make sure the raw materials coming in will actually deliver the quality you promised.
Check Ingredients
- Review COAs Carefully: Always match the supplier’s certificate to your spec sheet, pH, purity, active content.
- Run Basic Contaminant Tests: Things like microbes and heavy metals are a must, especially if you’ve got plant extracts.
- Inspect By Sight And Smell: I like to open containers myself. Any odd odor or texture is a warning sign.
- Save Retain Samples: Keeping a small sample of each lot helps trace problems later.
Keep Close With Your Manufacturer
- Pop Into The QC Lab Or Call Them: A quick visit or call shows you care. It also builds trust, so they catch issues early. TY Cosmetic welcomes partners to reach out anytime, reinforcing transparency and proving they’re invested in your brand’s long-term success.
- Request Extra Checks For Premium Lines: If you’re going high-end, go beyond the standard tests. It’s worth it.
- Keep Detailed Records: Good paperwork makes any recall smoother and keeps you ready for audits.
- Train Your Own Team: Make sure your staff knows what good vs. bad raw material looks like if they ever step on-site.
- Agree On Rejection Rules: Decide upfront what’s acceptable and what gets sent back to saves stress later.
Step#3 Pre-Weighing & Staging
Now that your raw materials are approved, it’s time to get them weighed and set up for production. This is where good prep avoids headaches in the mixer.
Weigh Ingredients Right
- Follow The Batch Sheet: Weigh each ingredient exactly as listed. Even small slips can change how your shampoo feels or performs.
- Keep Things Clean: Use separate, sanitized tubs for every material. This stops cross-contamination and makes tracking simpler.
- Label Clearly: I always mark each tub with the name, weight, and lot number. It keeps everything easy to spot once you’re on the floor.
- Double-Check Key Actives: Have someone else confirm critical weights like preservatives. A quick second look saves a lot of trouble later.
Set Up For The Mixer
- Line Up In Order: Place tubs in the order they’ll be added to the tank. It keeps the process moving and cuts down on mistakes.
- Stage Near The Line: Keep everything close to the mixer so operators aren’t running around. This also shortens production time.
- Check Tools And Scoops: Make sure clean scoops and utensils are ready. I’ve seen delays just because someone had to stop and wash gear.
- Hold Back Extras: If you’ve got water or carriers set aside for adjustments, keep them nearby. That way tweaks are quick if the blend needs it.
Step#4 Blending & Mixing
After everything’s weighed and staged, it’s time to get those ingredients blended. This is the moment where all your planning starts to look like a real shampoo.
Load Ingredients Into The Tank
- Start With Water Or Base: Most batches begin with water or a main surfactant. It gives you a smooth base for other ingredients.
- Add Powders Slowly: Dumping powders too fast can cause clumping. Sprinkle them in so they hydrate evenly.
- Keep Mixing Steady: Run the agitator at the speed your batch sheet lists. Too slow won’t blend, too fast can whip in air.
Watch The Batch As It Blends
- Check Viscosity As You Go: Use a simple dip stick or viscometer. Catching thickness changes early saves rework later.
- Look For Lumps Or Separation: Stop and scrape sides if needed. I’ve stood there plenty of times making sure solids don’t settle.
- Test Temperature If Needed: Some ingredients blend better warm. Make sure you’re staying in your target range.
- Note Times And Speeds: Write down when you added key parts and what speed the mixer ran. Good records protect you if issues pop up.
Step#5 Heating & Homogenization
After your batch is blended, it’s time to heat and homogenize. This step makes sure everything combines fully and your shampoo has a smooth, stable feel.
Heat The Batch Evenly
- Raise Temperature Gradually: Don’t blast the heat right away. Slow, steady warming keeps sensitive ingredients from breaking down.
- Stay In Your Target Range: Keep a close eye on the thermometer. Too hot can thin out thickeners or dull actives, too cool and things may not mix right.
- Keep The Mixer Running: Agitate gently as it heats. This stops heavier parts from settling at the bottom.
- Check Spots In The Tank: I’ve used handheld probes to test different areas. It helps catch any cold pockets that didn’t heat evenly.
Homogenize For A Smooth Texture
- Use A High-Shear Mixer If Needed: Some formulas call for extra shear to fully blend oils and surfactants. It breaks down tiny droplets, so your shampoo stays uniform.
- Run For The Right Time: Follow your lab’s guide on minutes and speed. Going too long can sometimes add unwanted air.
- Watch The Viscosity: I like to sample a bit mid-process. It tells you if the texture is on track or needs a slight tweak.
- Document Settings And Times: Note down RPMs and how long you run the homogenizer. It keeps future batches consistent and protects you if issues come up.
Step#6 Cooling & pH Adjustment
Once your batch is fully blended and homogenized, you’ll need to bring it down to the right temperature and fine-tune the pH. This step locks in stability and makes sure your shampoo is safe and gentle for customers.
Cool Down The Batch Properly
- Lower The Temperature Gradually: Don’t rush it with aggressive cooling. Dropping too fast can cause separation or shock delicate ingredients.
- Keep Agitation Going: Stir slowly while it cools. This keeps everything uniform and avoids hot or cold spots.
- Check Temperatures In Multiple Spots: Use a handheld probe around the tank. It helps catch uneven cooling that could mess with final texture.
- Wait Until It’s In Spec: Make sure it hits the target temp before moving on. Adding preservatives or fragrances too soon can reduce their performance.
Adjust pH To Final Range
- Use A Calibrated Meter: Always check pH with a reliable, clean probe. Paper strips aren’t accurate enough for production work.
- Add pH Adjusters Slowly: Pour in small amounts, then let it mix fully. I’ve seen people rush this and overshoot the target range.
- Stir And Re-Test Each Time: Give it a few minutes after adding acid or base, then check again. It takes a bit for levels to even out.
- Document The Adjustments: Write down how much you added and the final pH. It keeps your team covered if there are questions later.
Step#7 Quality Control Testing
With your batch cooled and adjusted, it’s time to run final checks. This step makes sure your shampoo meets all your quality standards before it ever hits a bottle.
- Check pH Again: Even after adjustments, I always confirm the final pH. It protects your customers’ skin and keeps your claims solid.
- Measure Viscosity: Use a viscometer or simple dip test. If it’s too thick or thin, you’ll spot it now instead of after filling.
- Run Micro Tests: Pull samples for micro analysis to check for bacteria and mold. It’s the key piece that clears your batch to ship.
- Do A Stability Pre-Screen: Put a small sample under heat or light for a quick look. It catches obvious separation risks.
- Document Everything Thoroughly: Keep clear records of each test and result. It’s your safety net if a customer ever questions your product.
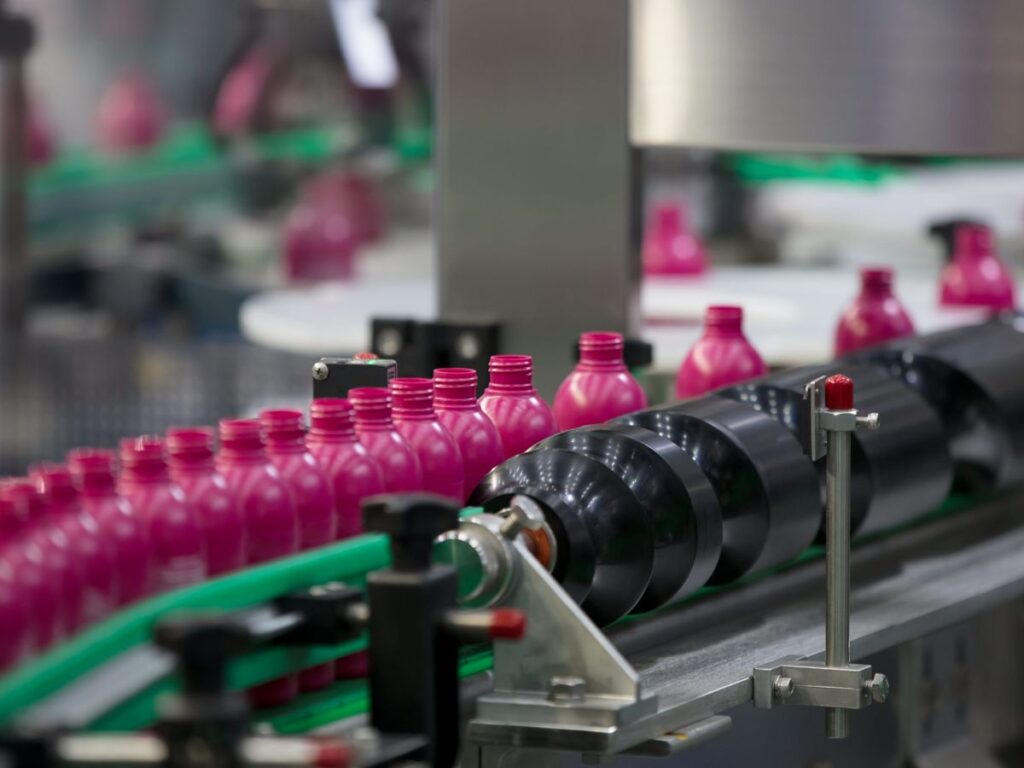
Step#8 Filling & Packaging
Once your batch passes quality checks, it’s time to fill and pack. This is where your shampoo finally starts looking like the product your customers will hold.
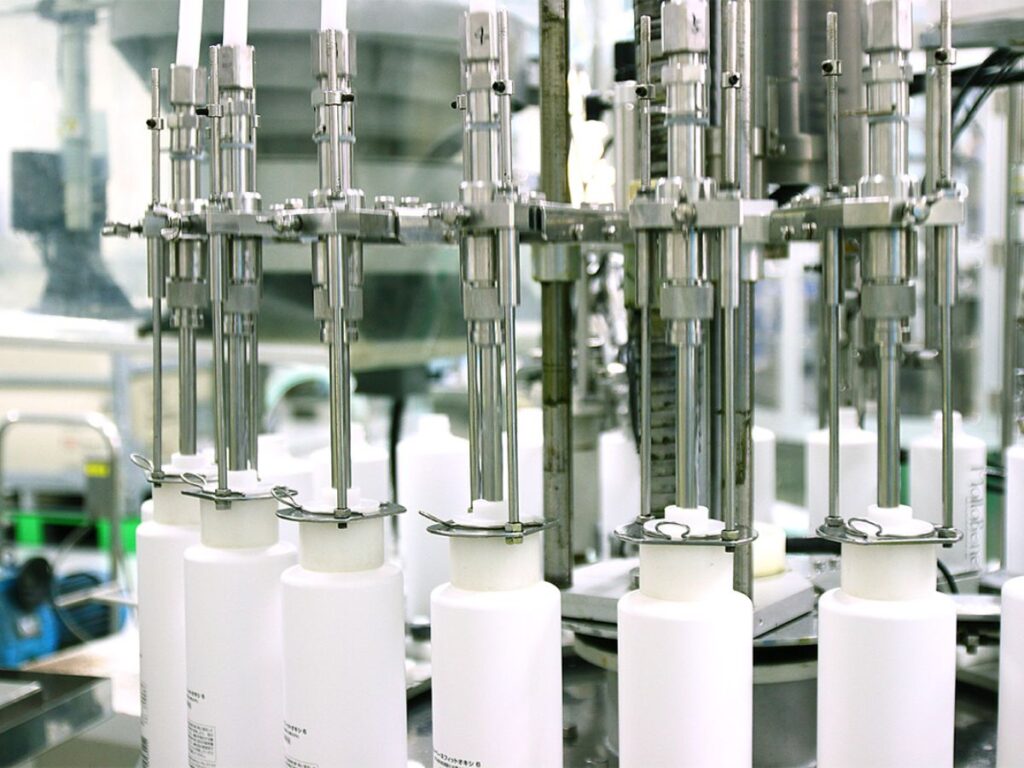
Set Up The Fill Line Right
- Sanitize Equipment First: Run cleaning and sanitizing cycles on fillers, hoses, and nozzles. I’ve seen entire batches compromised because someone skipped this.
- Check Fill Weights: Do a few test runs and weigh bottles. It makes sure each unit hits your label claims and avoids short fills.
- Adjust For Viscosity: Thicker shampoos might need slower speeds or bigger nozzles. Fine-tuning this now saves leaks or messes later.
- Watch For Air Pockets: Sometimes pumps pull in air with viscous products. Keep an eye out and slow down if needed.
Label And Pack Carefully
- Inspect Every Label: Make sure they’re straight, legible, and match the right SKU. Nothing ruins trust faster than mislabeled products. TY Cosmetic puts strong emphasis on precise labeling, helping your brand look professional and dependable every time.
- Use Clean Packing Stations: Keep cartons and pallets away from raw areas. It cuts contamination risks and keeps everything neat.
- Seal Cases Well: Tape boxes properly so they hold up in transit. It’s a simple step that saves on damaged returns.
- Record Batch And Pack Dates: Write down everything tied to that run. If you ever need to trace back, it’s all right there.
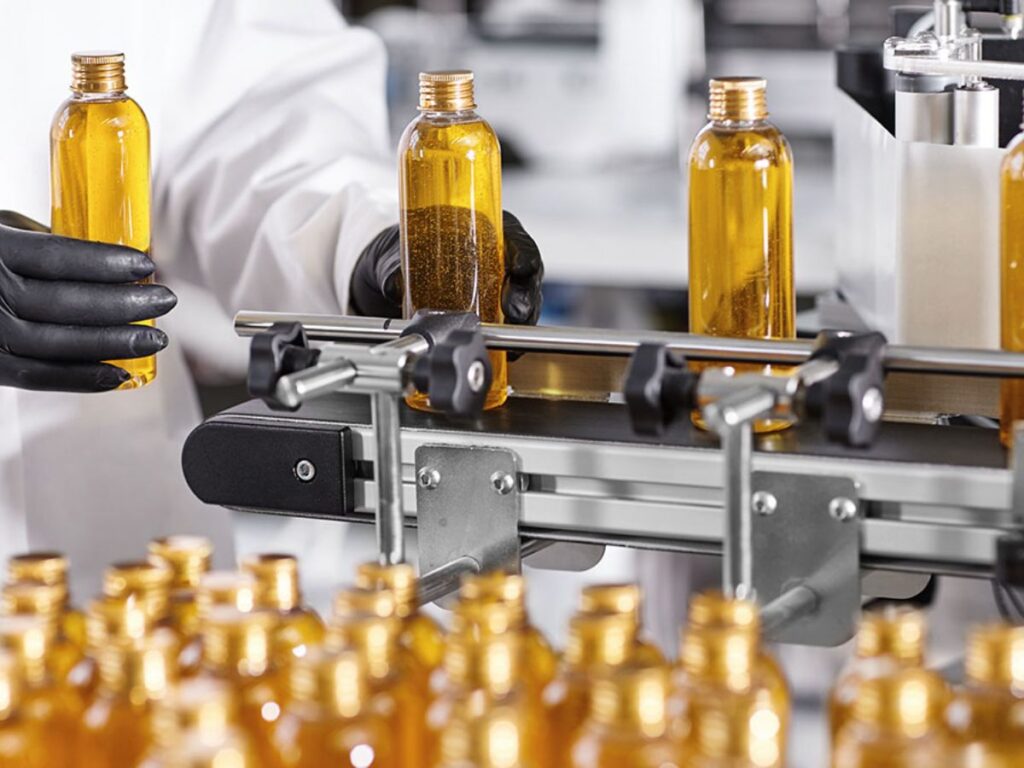
Step#9 Final Inspection
With everything filled and packed, the last step is a careful final inspection. This makes sure your shampoo is truly ready to ship out and represent your brand.
Give Each Batch A Last Look
- Check Packaging Quality: Look for dents, leaks, or loose caps. I’ve seen whole pallets returned because bottles weren’t sealed tight.
- Verify Labels Again: Make sure they’re all aligned and match the product inside. A quick spot check here can prevent big mix-ups.
- Confirm Lot And Expiry Codes: Check that every bottle shows the correct lot number and date. It keeps you covered if tracking is ever needed.
- Inspect Case Seals: Give cartons a gentle tug. If they pop open easily, they won’t survive shipping.
Sign Off With Clear Records
- Complete The Batch Report: Log final counts, any holdbacks, and the full QC sign-off. It’s your proof the batch met specs before leaving the floor.
- Store Samples Properly: Keep retains from each lot in a clean, labeled spot. I’ve relied on these more than once to solve customer questions.
- File All Paperwork Together: Keep QC checks, fill logs, and pack records in one place. It saves time if you ever need to pull them for audits.
- Release Only When Ready: Don’t rush shipments. Wait for your final paperwork and sign-off so everything’s by the book.
Conclusion
Remember that first warm batch I smelled fresh from the mixer? Now you’ve seen exactly how that shampoo came to life, step by step.
From careful formulation to final inspection, each stage matters for quality.
If you’re serious about building a shampoo brand that stands out, keep this guide close.
Ready to turn your ideas into reality?
Contact us today! TY Cosmetic is here to help you make a product your customers will love.