

I’ve worked with many brand owners who had the vision but didn’t have the process.
They knew they wanted to create a hand wash line, but had no idea what actually happened behind the scenes.
And honestly, I get it. Before I started working in manufacturing, I thought it was just about mixing ingredients and bottling them up to make hand wash. It’s not that simple.
Over the years, we’ve helped brands go from first samples to full production.
We’ve seen what works, what breaks down, and where people usually get stuck.
The good news? Once you know the steps, it all starts to make sense.
If you’re asking yourself, “What actually goes into making hand wash?”, this article will give you answers.
Here’s what we’ll cover:
- How raw materials are prepared and measured
- What happens during the mixing and batching process
- When and how to adjust texture, scent, and color
- The role of testing, filling, and final packaging
By the end, you’ll understand what really goes into each step so you can build your hand wash product with confidence.
Let’s jump in!
Quick Guide
Before we get into the full details, let’s look at the big picture. This table gives you a quick overview of what goes into making hand wash, step by step.
| Step | Stage | What Happens |
| 1 | Raw Material Procurement & Preparation | Ingredients are sourced, checked for quality, and prepped for blending. |
| 2 | Mixing and Blending | The formula is combined in a controlled environment for consistency and texture. |
| 3 | pH Balancing and Safety Checks | pH is adjusted, and early testing is done to confirm skin safety. |
| 4 | Fragrance and Color Additions | Scent and color are added to match your brand and customer experience. |
| 5 | Filling and Assembling | Product is filled into containers and fitted with pumps, caps, or seals. |
| 6 | Packaging and Branding | Labels, design elements, and any custom brand packaging are applied. |
| 7 | Quality Control and Assurance | Every unit is checked for accuracy, safety, and consistency. |
| 8 | Storage and Distribution | Finished products are stored safely and shipped to customers or warehouses. |
That’s the full outline, next, we’ll take you inside each part of the process.
Step#1 Raw Material Procurement and Preparation
You want to make hand wash but do you really know what goes inside the bottle?
This is where most first-time brand owners hesitate. The idea is there, but I know that you lack material ideas.
Get the Right Ingredients
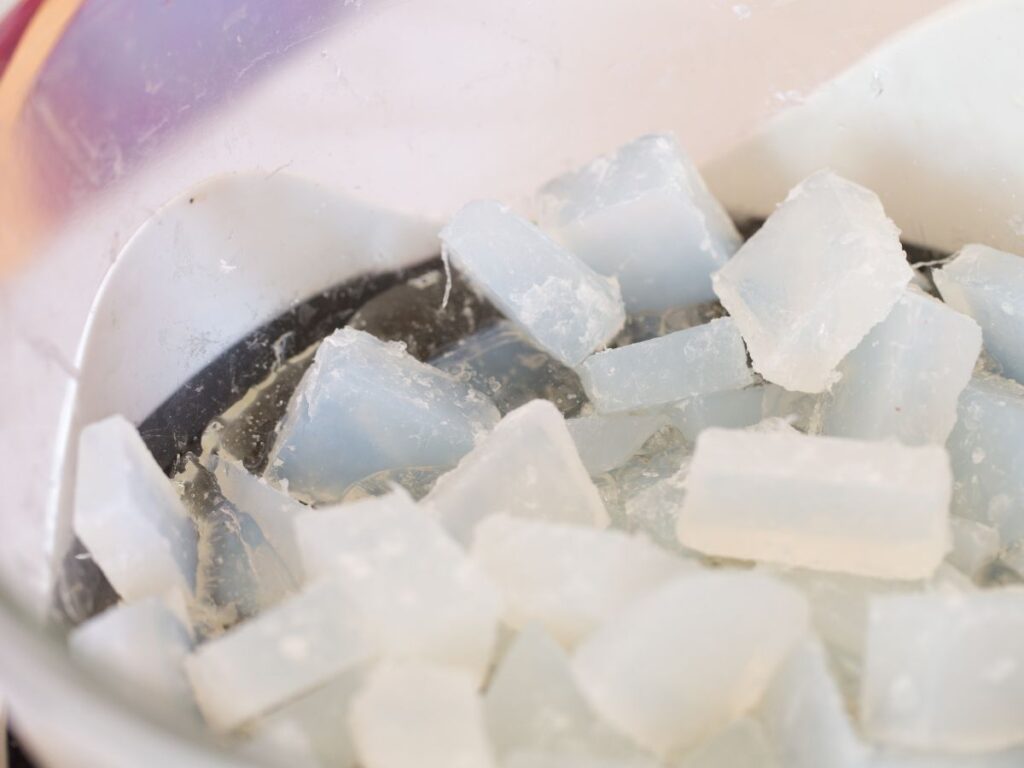
- List Your Essentials: You’ll need surfactants for cleansing, moisturizers, preservatives, thickeners, pH adjusters, and water. Get that list down first.
- Source Cosmetic-Grade Only: Always buy from certified suppliers who provide COAs and MSDS. It’s not just quality, it’s a GMP and ISO 22716 requirement (source: ISO 22716:2007).
- Check Expiry and Batch Codes: Old or poorly stored ingredients can mess up your color, scent, or texture. Make sure every batch is fresh.
- Watch Trends: If your target is clean beauty, skip sulfates and dyes. Use glycerin, aloe, or plant-based surfactants that customers look for.
- Avoid Cheap Shortcuts: I’ve seen brands try saving 30% with untested suppliers. One client ended up delaying launch by two months after failed micro tests. Learn from that.
Ensure Full Compliance
- Test Compatibility: Some surfactants clash with certain moisturizers, causing clumps or separation. Always run checks before going into full production.
- Keep Full Traceability: Tie each ingredient back to its batch and supplier. If there’s ever a problem, you’ll know exactly where it came from.
- Have Documents Ready: Build a complete file with COAs and MSDS for every raw material. That’s your shield if regulators ask.
- Ask These Questions Before Production Begins:
- Is every material certified for cosmetic use?
- Are compliance documents like MSDS/COA ready?
- Can the factory trace every ingredient back to the source?
Once your materials are solid, you’ve already solved half the problems most new brands face. And if you’re looking for a manufacturer who will guide you through every step with real support and a focus on quality, TY Cosmetics is ready to help you build a product your customers will trust.
Step#2 Mixing and Blending Process
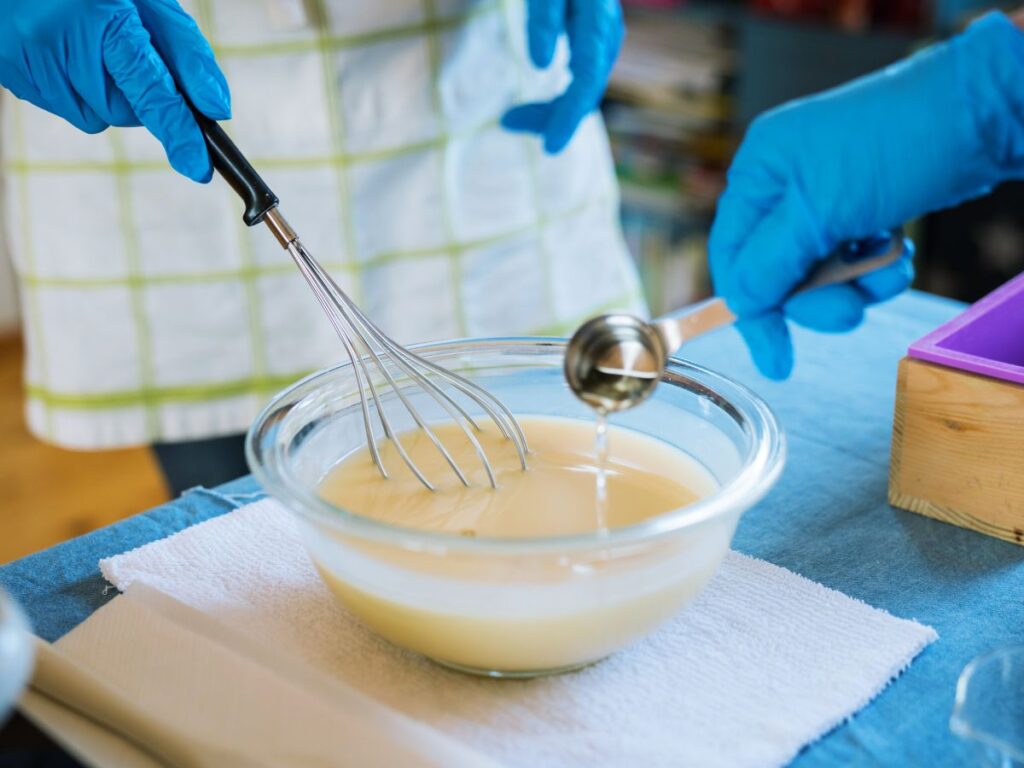
Once your raw materials are ready, it is time to bring them together. This is the step where your product finally starts to look and feel like hand wash. Many brand owners underestimate how exact this part needs to be. I have seen what happens when it gets rushed or skipped.
Mix The Ingredients
- Ingredients Are Added in Order: It starts with deionized water. Surfactants go in slowly to keep foam controlled. Moisturizers and preservatives follow, with thickeners saved for last.
- Mixing Speed Matches the Formula: Lightweight hand washes stay stable with gentle blending. More viscous blends benefit from stronger agitation. Each formulation has its own best approach.
- Temperature Stays Closely Monitored: Certain actives lose their benefits if overheated. Keeping within the tested range is part of following ISO 22716 quality standards (source: ISO 22716:2007).
- Equipment Fits the Scale: Small runs are blended in stainless kettles. Larger production goes into industrial tanks with built-in temp controls and precision mixers.
- Consistency Is Tested Throughout: Samples are pulled from the top, middle, and bottom to make sure the texture is truly uniform.
Blend The Ingredients
- Sanitizing Happens Between Batches: Even small traces from a previous run can disrupt stability. Tanks, blades, and hoses are cleaned thoroughly.
- Mix Speeds Adjust to Avoid Air: Over-agitating pulls air into the blend, creating foam or weak spots. Speeds are balanced and low-shear finishing is often used.
- Full Records Are Kept: Every step, from temperatures to ingredient order, is documented for your GMP compliance file.
- pH and Viscosity Checks Run During Mixing: Testing is done throughout, not just after, to catch any issues early.
- Blending Continues Until Stable: Fragrance or color is never added until the base is confirmed uniform and ready.
Step#3 pH Balancing and Safety Checks
After your hand wash is fully blended, it might look ready but it’s not done yet. The next step is making sure the formula is safe for skin and stable over time.
I used to think if a product smelled good and looked okay, it was ready. I learned the hard way that’s not enough.
Balance pH Correctly
- Test and Adjust pH: For hand wash, the target is usually between 5.0 and 6.5. This range keeps it skin-friendly but still effective at cleaning.
- Use Precise Tools: pH strips give rough estimates, but digital meters catch tiny shifts. Even small pH errors can change how your formula feels or irritate sensitive skin.
- Check Preservative Range: Many preservatives only work within narrow pH limits. If pH drifts, your hand wash becomes more likely to spoil or grow microbes.
- Run Patch Tests: Small amounts are applied on different skin types. Often it starts with in-house team or trusted volunteers before scaling up.
- Record All Changes: Any tweaks with citric acid or sodium hydroxide are fully logged. This builds your GMP file and helps match future batches (source: FDA Cosmetic GMP Guidelines).
Protect Formula Stability
- Avoid Future Spoilage: Keeping pH in range helps your preservatives do their job, reducing the risk of mold or bacteria.
- Protect Your Customers: Proper pH lowers chances of irritation or unexpected reactions on sensitive skin.
- Support Consistent Feel: Balanced pH makes sure your hand wash feels the same each time someone pumps it out.
- Prevent Costly Recalls: Skipping pH checks can lead to batches that fail later, costing you trust and money.
- Strengthen Your Reputation: Customers may not see pH tests, but they notice when a product feels right every single time.
Step#4 Fragrance and Color Additions
At this point, your formula is stable, but it is still missing personality. This is one of my favorite stages. Not because it is technical, but because this is when your product starts to feel truly alive.
Add Fragrance Safely
- Choose Cosmetic-Grade Scents: Use fragrances or essential oils approved for rinse-off products. Even natural oils must be dosed carefully since they can irritate skin if used too heavily.
- Add After pH Balancing: Dropping in scent once pH is set keeps fragrance truer and more stable. Adding too early can lead to scent loss or odd reactions.
- Check Preservative Impact: Some essential oils can slightly change preservation needs. It is smart to confirm the preservative system still holds.
- Watch for Over-Layering: Too many competing fragrance notes can make the final product confusing. Aim for clear, simple profiles that match the brand feel.
- Document Additions: Each fragrance addition gets logged so you can repeat it exactly in future runs.
Color and Customer Appeal
- Pick Brand-Right Colorants: This might mean food-safe dyes or plant-based pigments. If your brand leans eco-friendly, skipping added colors might be the best move.
- Test in the Actual Packaging: Color can shift once inside the bottle. What looks soft beige in the tank might seem muddy behind tinted plastic. Always check before full production.
- Match Color and Scent to Season: A warm vanilla might pair well with a creamy tone for winter. A fresh citrus and soft green can feel right for summer. These choices guide how customers feel when they pick it up.
- Run Visual Checks Under Store Lights: Retail lighting often changes how products look. Small samples are tested under bright retail-style lights to avoid surprises.
- Build Emotional Connection: One of my favorite projects was a mint-scented hand wash with a pale sea-glass green. It felt clean but calming. That balance is what keeps people reaching for the bottle again.

Step#5 Filling and Assembling
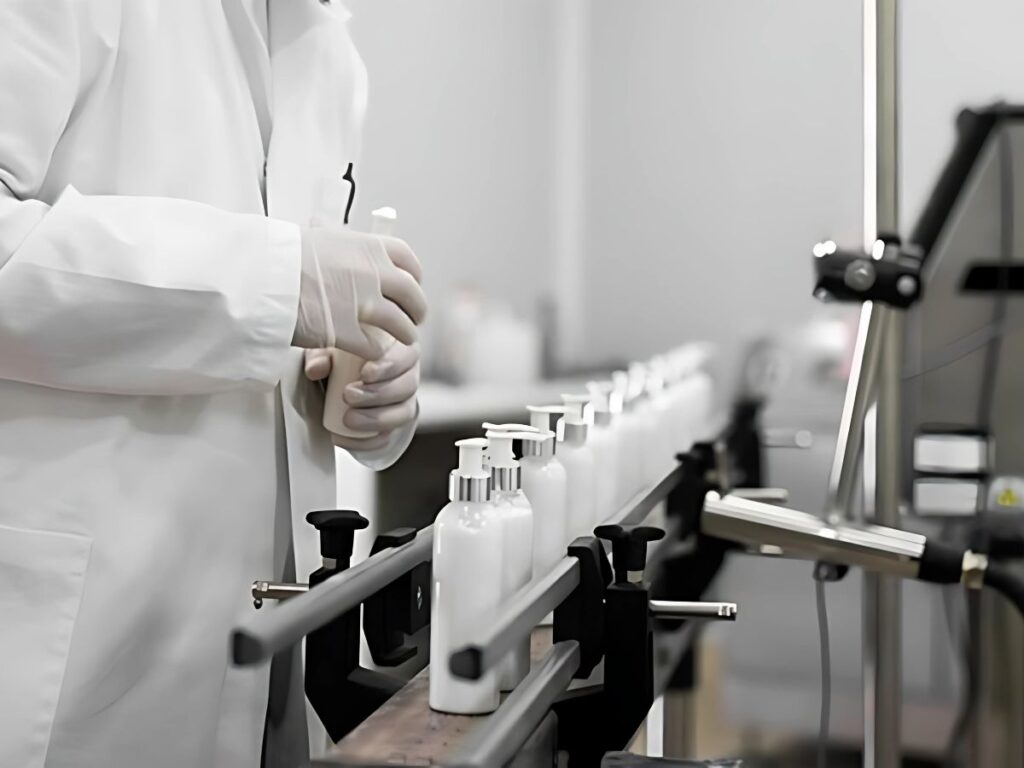
Once scent and color are finalized, your formula is ready to move into its real home: the bottle. This is the step that changes your hand wash from a raw bulk product into something that looks retail-ready. It is also where clean handling, equipment accuracy, and tight timing come into play.
Fill with Precision
- Pick the Right Equipment: Smaller orders under 10,000 units often use semi-automatic machines with manual capping. Larger runs are best handled by fully automated filling and capping lines to hit volume targets.
- Maintain Clean Conditions: Using cleanrooms or tightly controlled areas keeps the formula sanitary and avoids contamination during transfer.
- Calibrate for Exact Fills: Nozzles get set to precise volumes. Under-filled bottles disappoint customers. Overfills waste products and packaging space.
- Confirm Packaging Compatibility: Not all containers handle filling the same way. Some work better with top-fill nozzles, others need side-fill. Certain caps require special torque settings. This is checked ahead of time to avoid problems.
- Run Small Test Batches: Before any full run, 20 to 50 test units are filled. It is the easiest way to spot leaks, misalignments, or label placement issues.
Build the Final Presentation
- Assemble All Extras: Some brands include pumps, shrink bands, inner seals, or tamper-evident caps. These steps must be planned up front and staged properly.
- Inspect During Assembly: Staff or sensors check for crooked caps, missing seals, or scuffed labels. Better to catch it on the line than in a customer’s hand.
- Log All Settings: Filling speeds, torque pressures, and lot codes are documented to meet GMP requirements (source: FDA Cosmetic GMP Guidelines).
- Stage for Packing: Finished bottles are lined up on trays or conveyors, ready for boxing and shipping.
- Confirm Every Piece Is Consistent: A final quick check ensures the entire batch looks uniform on shelf.
Step#6 Packaging and Branding
Once your product is filled and assembled, it is time to make it speak for your brand. Packaging is never just about function. It is also about identity. I have seen countless times how those first few seconds when someone picks up a product decide whether it goes into the cart.
Build Strong Packaging
- Pick the Right Outer Type: Tubes, pump bottles, flip-tops, or foaming dispensers all send different messages. Choose what matches your brand’s positioning, price point, and target customer.
- Apply Labels Precisely: Whether using wrap-around designs, front-and-back panels, or shrink sleeves, labels must go on straight, smooth, and without bubbles.
- Use Quality Printing: Fonts should be crisp, colors bold or subtle depending on your look, finishes consistent. Whether you pick matte, gloss, foil, or clear windows, every choice signals something about your product’s value.
- Include All Required Info: Regulations call for batch codes, ingredient lists, net weight, and safety warnings. Having these printed cleanly shows not just legal compliance but brand professionalism.
- Test Durability: I remember a winter shipment where condensation caused labels to peel. Since then, every run gets tested under heat, cold, and moisture to make sure labels stay put.
Show Your Brand Story
- Match Look to Feel: A calming hand wash formula should come in packaging that looks calm. A bright, citrus scent should be paired with a bold design.
- Think About Shelf Impact: From two feet away, someone decides if your product feels premium, fun, natural, or safe. Color, shape, and texture all work together.
- Run Small Focus Checks: Some brand owners order a few dozen units to place in lighting similar to stores and gather feedback. It often leads to tweaks that pay off in real sales.
- Build Unboxing Trust: Smooth seams, secure caps, and labels that do not slip make the entire experience feel worth the price.
- Confirm Your Message Shines Through: Each detail from artwork to label finish is part of the story your product tells when someone picks it up.
Step#7 Quality Control and Assurance
After your hand wash is filled and packaged, it may look finished, but it is not truly ready until it clears final quality checks. Quality control (QC) and quality assurance (QA) are what confirm your product is safe, stable, and consistent. I have always believed this is what separates a basic contract factory from a true brand partner. Anyone can fill bottles. Standing behind what goes inside them is what builds long-term trust.
Check Every Batch
- Keep Retention Samples: A sample from every production run is stored to track shelf life and provide a record in case of recalls. At TY Cosmetics, they make sure every product they create has a clear, traceable history, giving your brand the credibility it needs to grow, earn trust, and meet global standards.
- Verify Labels Meet Laws: Ingredient lists, batch numbers, weights, and country-specific markings are all confirmed. Small mistakes here can cause big compliance problems.
- Inspect Visually and Physically: Look for leaks, air bubbles, color shifts, or sediment. Even a crooked label chips away at customer confidence.
- Recheck pH and Texture: Some formulas change slightly after sitting. Post-fill checks catch shifts early so adjustments can be made before shipping.
- Test Seals and Closures: Pumps, caps, and seals are pressure-tested to guard against leaks during transport and normal use.
Build Trust Through QA
- Document Everything: Every test, adjustment, and batch gets logged. These records build your GMP file and make scaling up or handling audits much smoother (source: FDA Cosmetic GMP Guidelines).
- Protect Shelf Performance: Regular checks on retention samples track how the product holds up over time, which helps you predict reorder timelines and avoid surprises.
- Safeguard Global Shipments: Testing seals and pumps under different conditions keeps your product performing whether it ships locally or overseas.
- Catch Small Issues Early: Finding and fixing a crooked label or slightly off pH now means customers never see it.
- Support Future Growth: Having a clean, traceable history for every batch builds brand credibility and helps meet retailer or regulatory demands as you expand.
Step#8 Storage and Distribution
This stage might seem like a formality, but it actually protects all the work done up to this point. I have had brand owners call months after production, worried because their product changed color or texture. Nearly every time, it traced back to poor storage or rough shipping. That is why this step is taken seriously.
Store Under the Right Conditions
- Use Temperature-Controlled Warehouses: Heat and humidity can break down formulas, fade colors, or loosen labels. Hand wash is kept in cool, dry spaces with stable conditions to maintain quality.
- Follow FIFO Inventory: First-in, first-out keeps older batches moving out first. This prevents product from aging at the back of shelves and accidentally reaching customers past its prime.
- Label Outer Cartons Clearly: Each case lists batch numbers, product names, and quantities. This makes tracking, recalls, or audits far easier.
- Plan for Seasonal Shifts: Large shipments are often avoided in peak summer without added insulation. High heat during transit can compromise a batch before it ever hits store shelves.
- Keep Organized Stacking: Cartons are stored on sturdy pallets to avoid crushing lower boxes and damaging seals.
Ship With Care and Trust
- Pack With Protective Materials: Each box is lined or padded to stop bottles from moving, leaking, or breaking.
- Work With Reliable Carriers: Shipping partners are chosen for experience with cosmetics and liquids, both locally and overseas. They understand how handling mistakes can damage your brand.
- Check Transit Times: Routes are planned to avoid long, hot storage stops that can impact sensitive formulas.
- Document Shipping Details: Tracking numbers and delivery conditions are logged, so you always have a clear record of where your batches went.
- Support Retail Launches: For bigger launches, many brands choose to stagger shipments to avoid warehouse overload and keep displays fresh.
Dive Deeper Into Our Resources
Interested in discovering more? Gain instant access to our diverse range of products:
Still haven’t found what you’re looking for? Don’t hesitate to contact us. We’re available around the clock to assist you.
Conclusion
So now you know what goes into making hand wash from raw materials to final packaging.
It’s more than just mixing and bottling, right?
I’ve stood beside brand owners just like you, seeing light bulbs go off once they learned these steps.
Why wait to turn your idea into a real product?
You already have the idea. Now you have the process.
Are you ready to take the next step?
If you’re looking for a manufacturer who can guide you and treat your product like their own, contact TY Cosmetics today!